International roaming is super awesome with your DIY plan. It’s much less hassle to have your personalized data, voice and SMS quota on your overseas trip.

(Source: giphy.com)
And with Roam Like Home’s flat rates, it also means much more savings! If you’re going to travel beyond Malaysia, here’s our step by step guide on how you can activate and enjoy Roam Like Home across 72 countries:
Step 1 – Check the dashboard of your Yoodo app!
Look for the ‘Add Roaming/IDD’ button on your home screen and tap it.
Step 2 – Choose your destination
You’ll then see a new screen with two options. Select ‘Roaming’.
From there, scroll through then tap on the country you’re planning to travel to!
Step 3 – Select your Roam Like Home pass
You’ll have a choice between 1-day, 3-day, 7-day and 15-day Roam Like Home passes.
There’s more value with the longer duration passes, but choose whichever suits your travel duration.
Don’t worry if your overseas trip takes longer than expected. You can always grab a new pass when your current one expires by following the same steps!
Step 4 – Confirm your payment
Once you’ve chosen your Roam Like Home pass, you’ll see a new screen with all the deets.
Just tap ‘Buy’ once you’re happy with your order. A confirmation pop-up will appear. Now you just need to tap ‘Confirm’ and you’re all set!
Step 5- Activate Roam Like Home
(Source: giphy.com)
Good news! You don’t need to manually activate Roam Like Home. Once you arrive at your overseas destination, simply use your data, voice or SMS.
Viola, you’re now internationally roaming with your personal local plan!
Bonus Step – Set your APN correctly
To ensure your Roam Like Home pass activates properly, double check your APN settings.
If your APN name is already ‘Yoodo’, your roaming pass is ready to roll! If it’s not, don’t worry. Fixing your APN settings takes less than a minute!
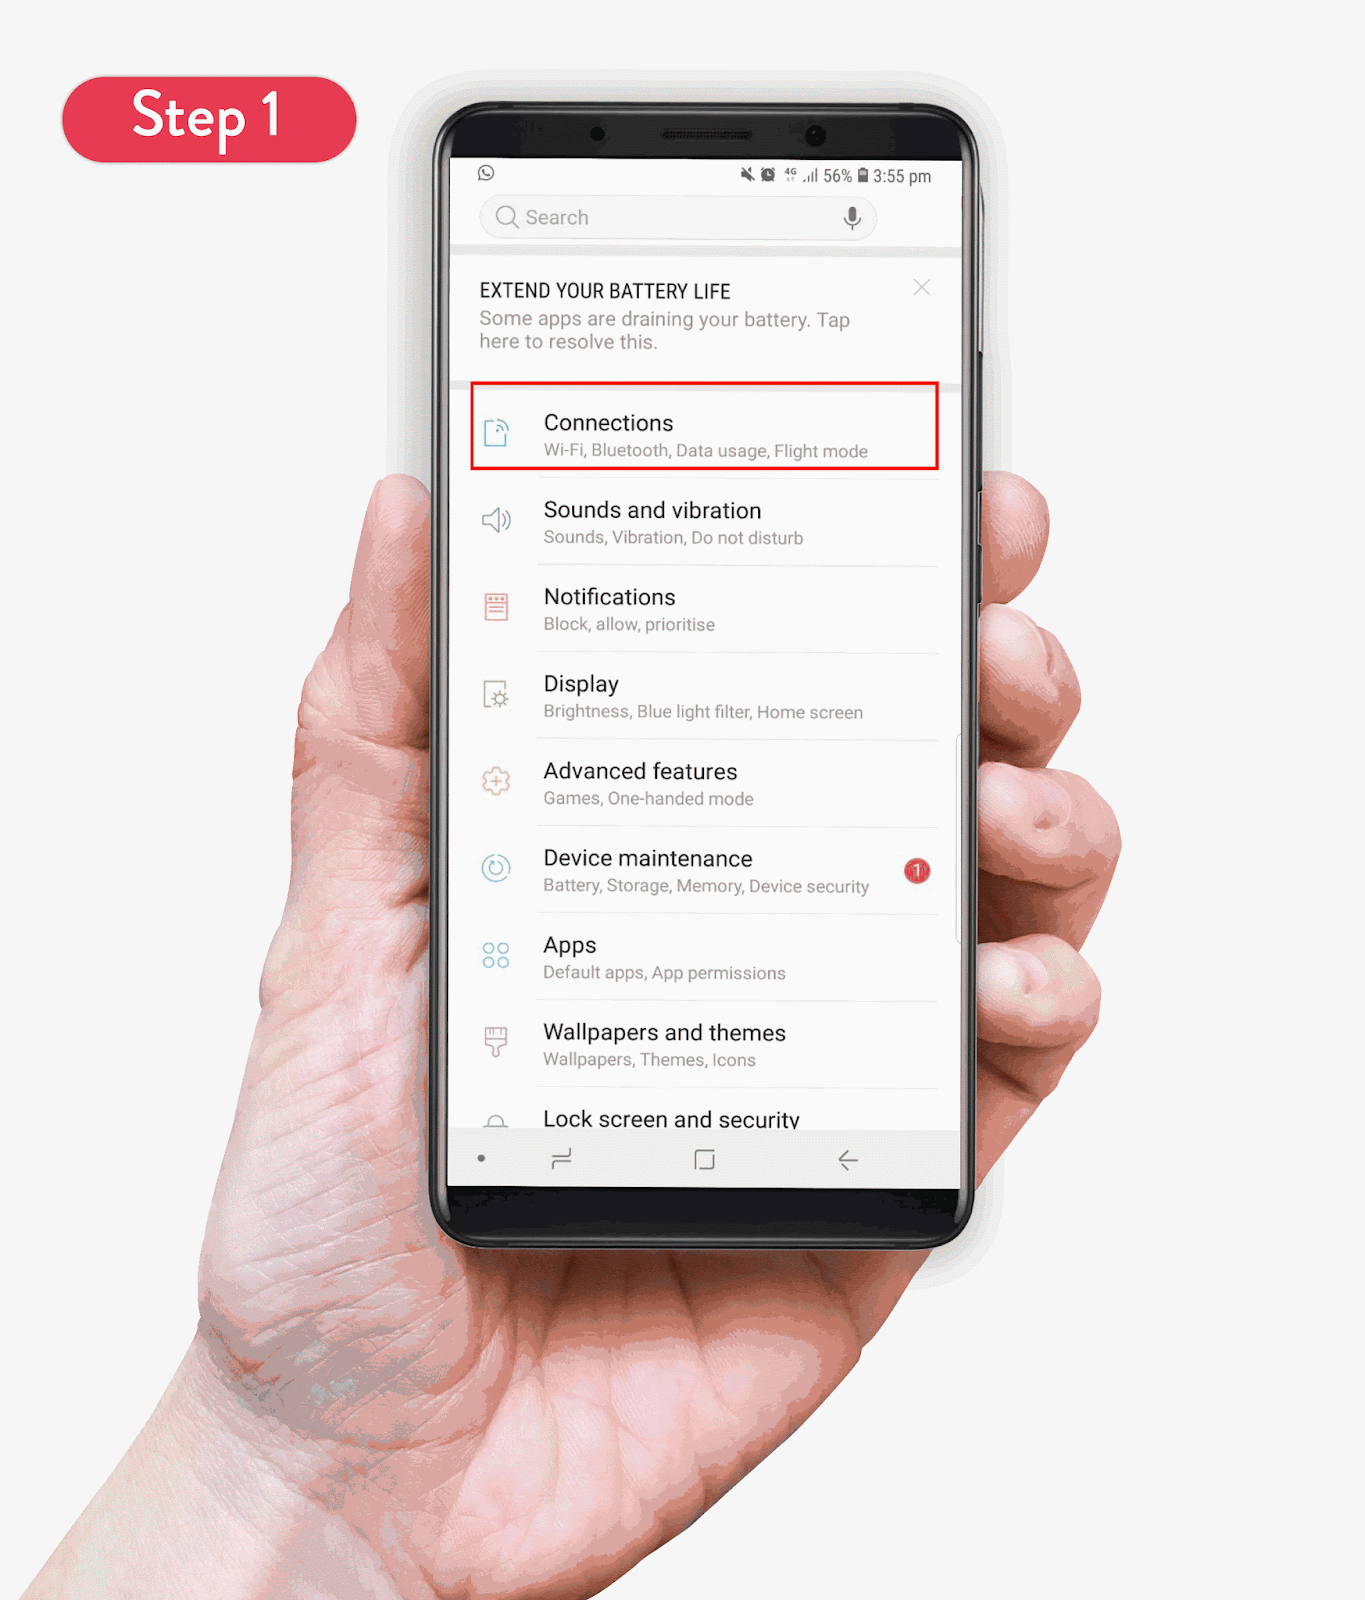
For Android users, follow these steps:
Go to SETTINGS > CONNECTIONS > MOBILE NETWORKS > ACCESS POINT NAMES > CELCOM INTERNET > APN > change name to ‘Yoodo’.
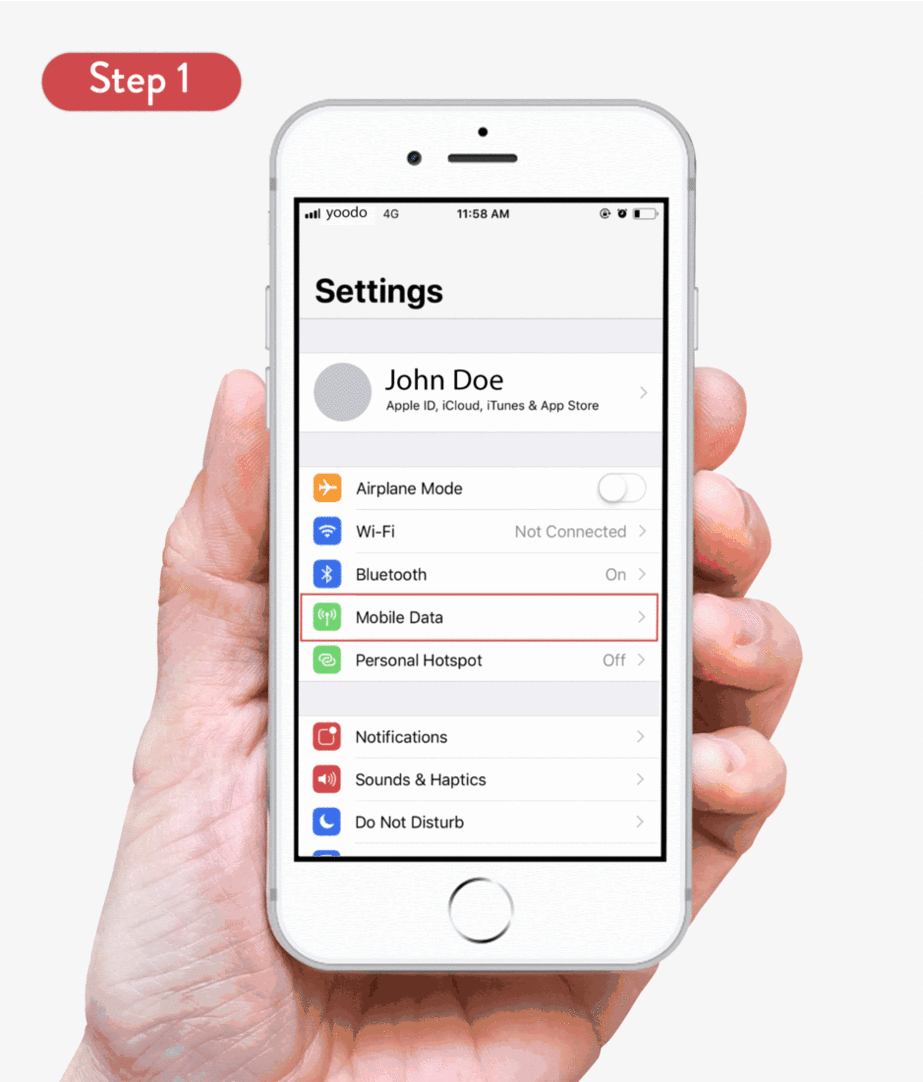
Wait, you’re an iOS user? Then do THIS:
Go to SETTINGS > MOBILE DATA > MOBILE DATA NETWORK > APN > change name to ‘Yoodo’.
Ain’t it super easy to enjoy Roam Like Home with Yoodo? If you like what you see, what are you waiting for? Get started with Yoodo now! ?